Related Blogs
Table of Content

The rapid rate of success by centralizing data has offered the simplest way to collect, store and maintain data at a single location by providing easy access to all users. The most renowned product developed by Microsoft to cater to this need is Dynamics 365. Dynamics 365 is not a CRM product or an ERP, it is a combination of both CRM and ERP built-in cloud-based by Microsoft. Dynamics 365 has multiple entities that are used to manage the business data in Dynamics 365.
SharePoint Online is a cloud-based service built by Microsoft, which helps organizations to share & manage their documents, internal sites and organization data from anywhere like from office/home/mobile by using SharePoint development services.
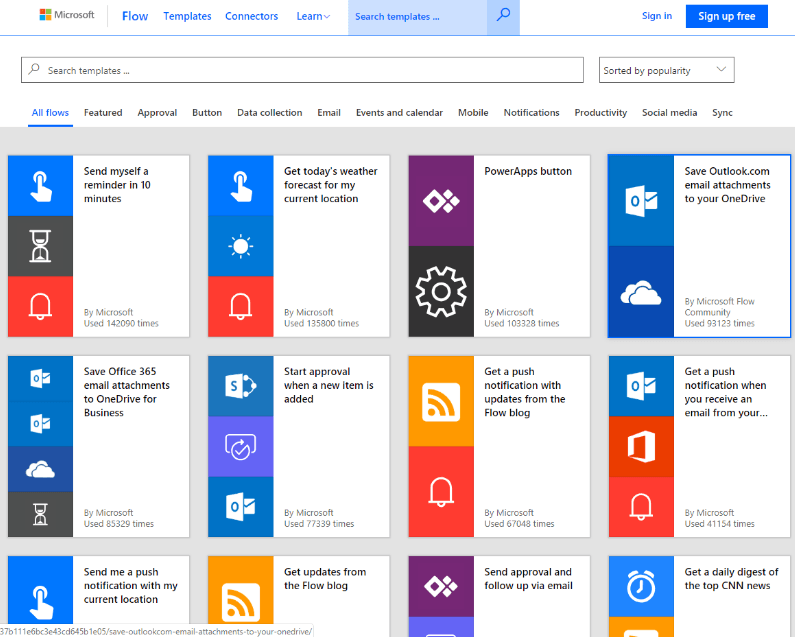
Many organizations use Dynamic 365 and SharePoint Online to manage their data. Some of them use it to copy data from Dynamic 365 to SharePoint online or vice versa. Microsoft has provided one App – Microsoft Flow aka MS Flow which allows users to create and automate workflows and tasks across the applications. Microsoft is providing multiple options in ready to use templates for the same. It has some sort of events that can be triggered in the background for events such as – create, update or delete items, etc. across multiple applications.
Using this software, SharePoint developers can synchronize the Dynamics 365 data/record/activity with SharePoint Online. In short, using MS Flow, users can automate the repetitive processes in the background. MS Flow also provides many default templates with options like create/update/delete items in SharePoint/Dynamics 365, so the user can use them very easily. Also, the user can use/call the custom API services in MS Flow for streamlining certain business processes.
Prerequisites
To use Dynamics 365, SharePoint Online and MS Flow, we require an Office 365 license with these services enabled on it. Let’s create an MS Flow to copy data from Dynamic 365 to SharePoint Online site using MS Flow.
Create MS Flow to add the folder in the SharePoint document library when a new item is created in Contacts under Dynamic 365
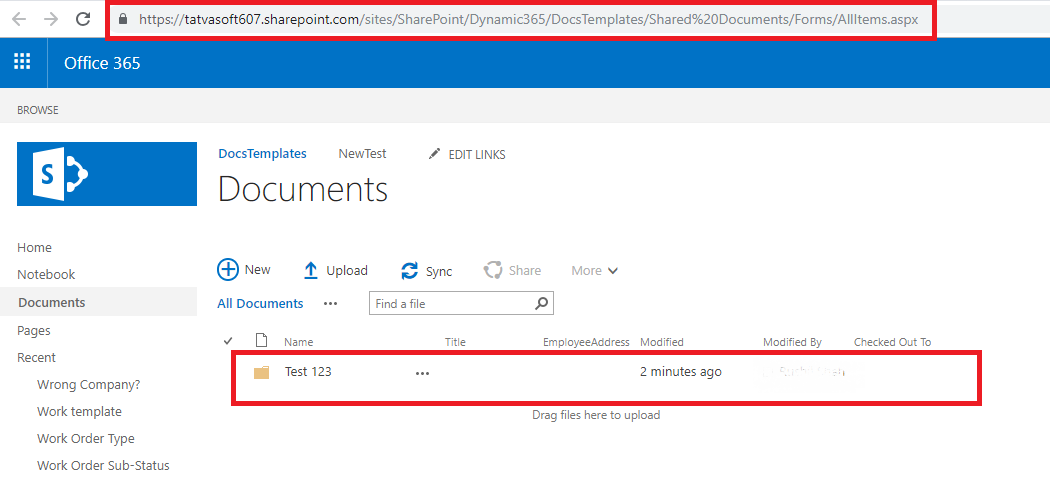
The case would be like if the user creates a new item in an entity (e.g., contacts) in the Dynamics 365, it will automatically create a folder using the “Full Name” attribute of that dynamics 365 contact entities in the SharePoint Document library.
Here are the steps to achieve this:
- Open the Flow URL: https://flow.microsoft.com
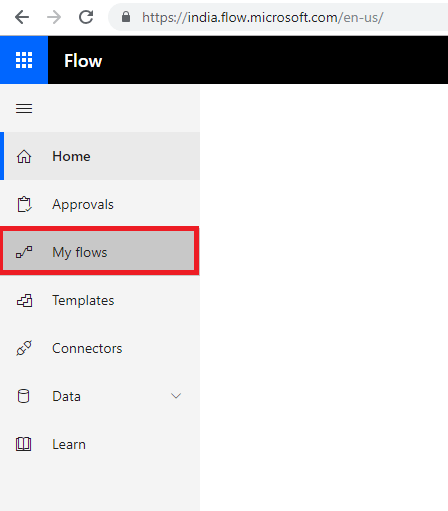
- Click on My Flows from the left menu.
- Click on New > Create from the blank.

- Click on the “Create from blank” button.

- It will open the New Microsoft Flow screen.
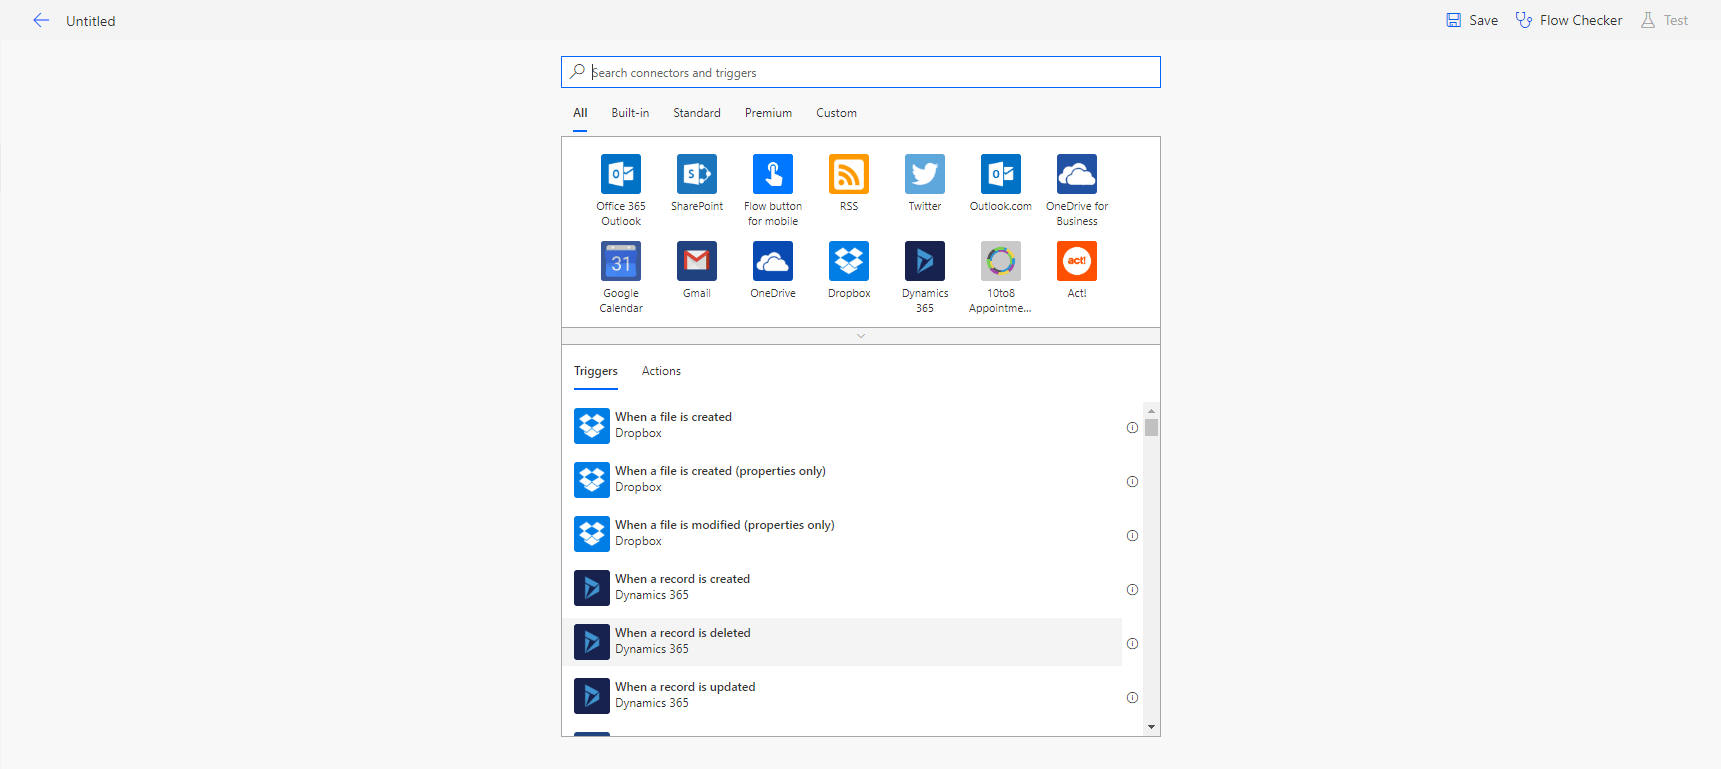
- Update the Title of Microsoft Flow from the top-left corner in the Microsoft Flow screen, as shown below screenshot.
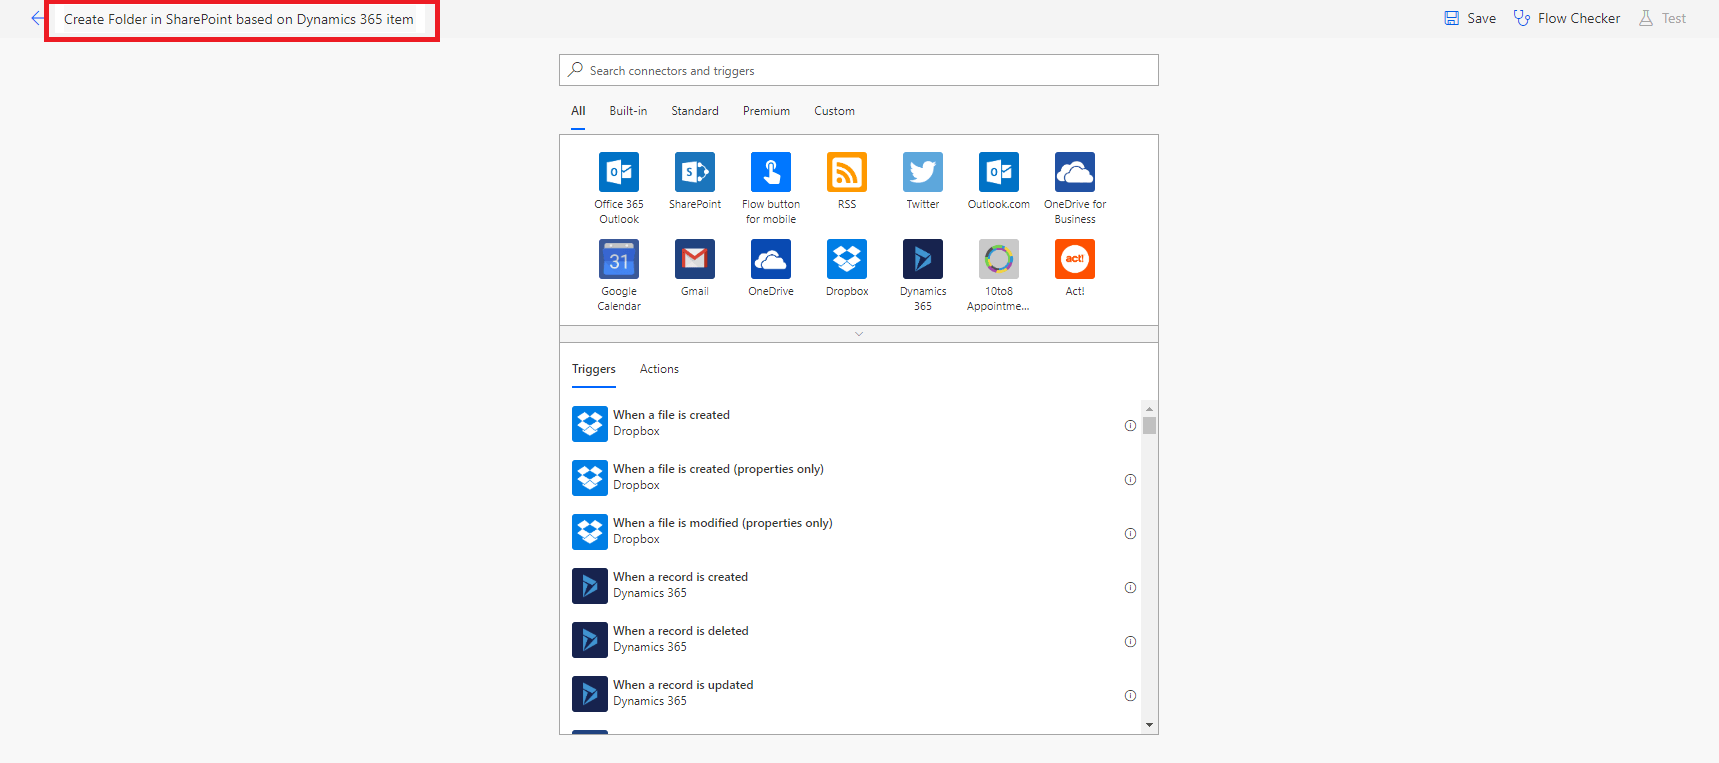
- Now, search the “dynamics” keyword in the search box and click on the “Dynamics 365” from the results.
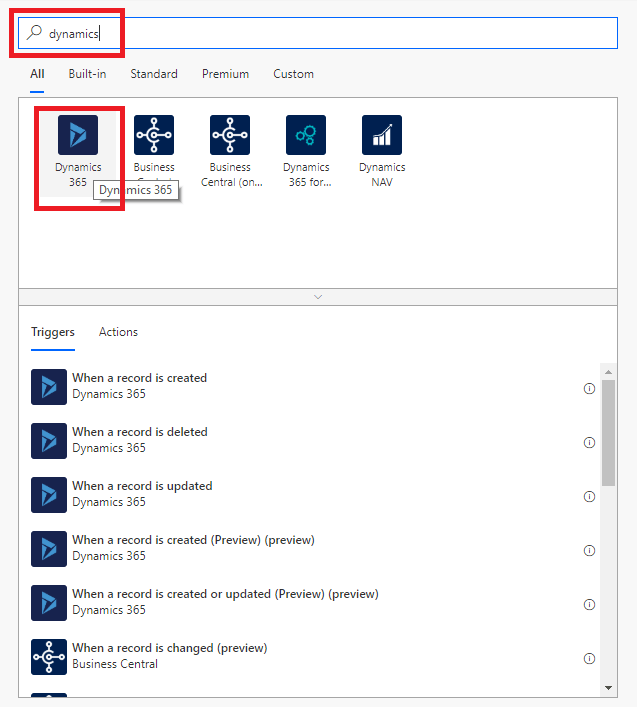
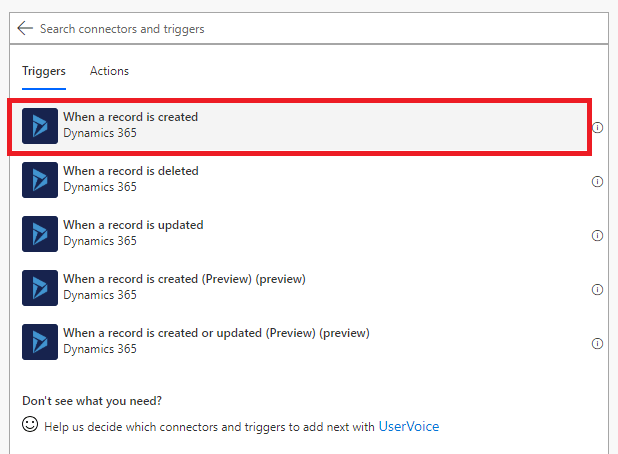
- It will show all the triggers/actions related to Dynamics 365. Select “When a record is created” from the Triggers tab.
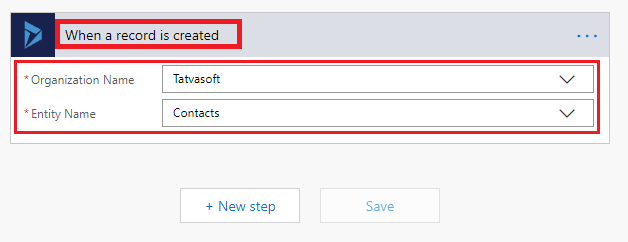
- Select a Dynamics 365 Organization Name from the dropdown.
- It will populate the Entity name in the Entity Name dropdown, select the Entity name (e.g., Contacts) in which we want to add a trigger.
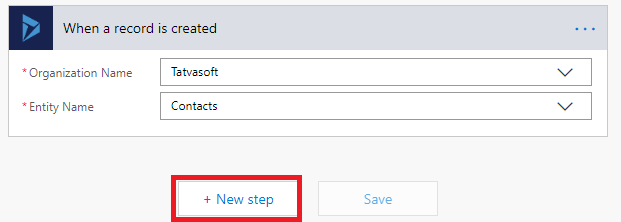
- Now, click on the “New Step” button to add the SharePoint action once the record is created in Dynamics 365.
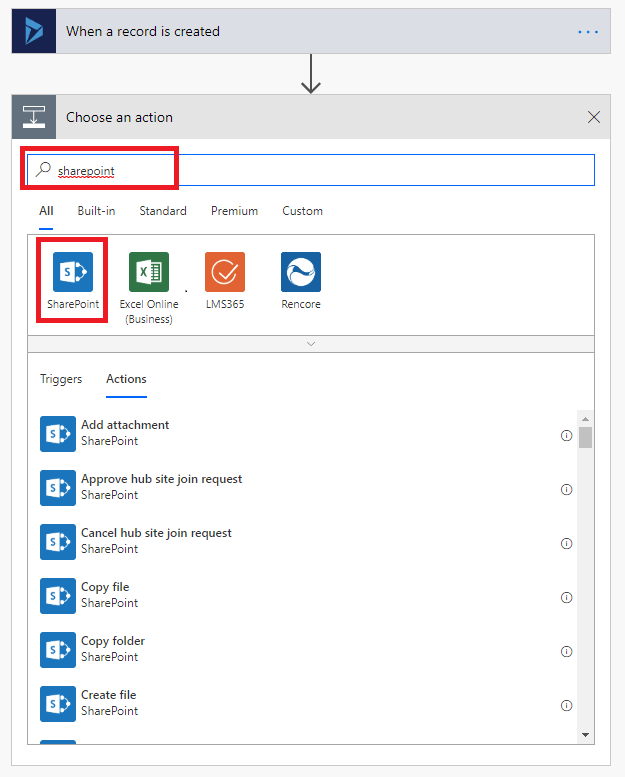
- Now, search the “SharePoint” keyword in the search box and click on the “SharePoint” from the results.
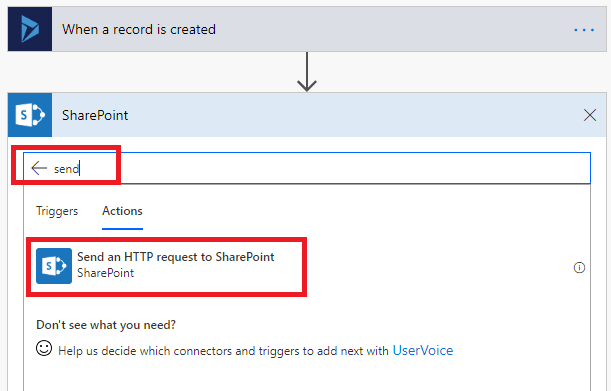
- It will show all the triggers or actions related to SharePoint. Search the “Send” keyword in the search box, it will show the “Send an HTTP request to SharePoint” action. Click on it.
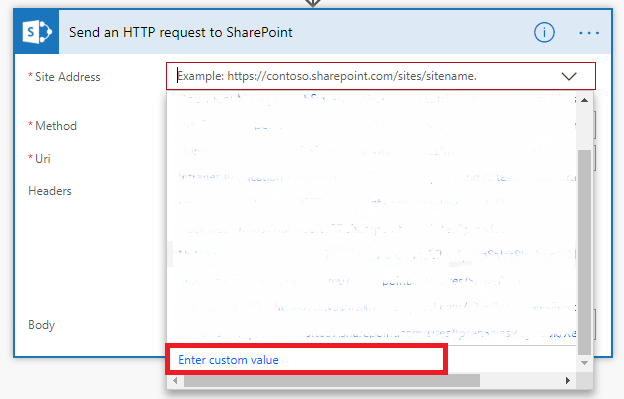
- It will ask for the below details:
- Site Address: Select the site where the document library is available. If your site is not available on the list, then click on the “Enter Custom value” option and enter your site URL manually.
- Method: Select the Method like GET, PUT, POST, PATCH or DELETE. In our case we need to create a Folder in the document library, so we will use the POST method.
- Uri: Enter the Resource Identifier URL like this directory as shown below.
“_api/Web/GetFolderByServerRelativeUrl(‘Shared%20Documents’)/Folders”Note: Here SharePoint developer is creating a folder in the root directory of the default document library, so we have used “Shared%20Documents”. If a user wants to create any other document library or any other folder then we need to change it accordingly.
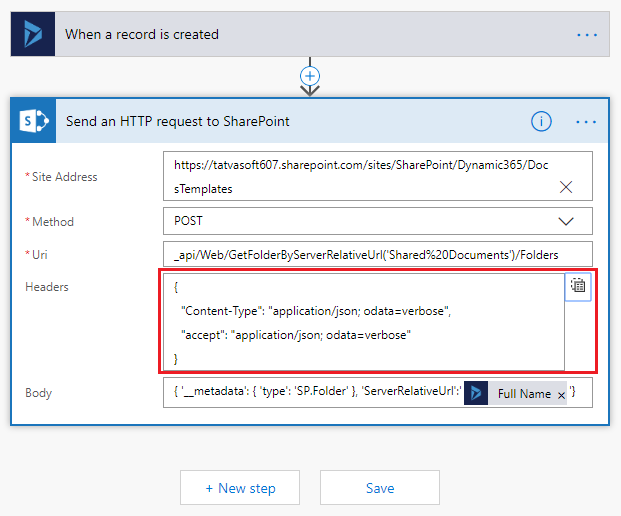
- Headers: Now we need to below two headers in the header section for our POST method call.
i. Key: Content-Type, Value: application/json; odata=verbose
ii. Key: accept, Value: application/json; odata=verbose
Note: Below is Text-mode header:
{ “Content-Type”: “application/json; odata=verbose”,
“accept”: “application/json; odata=verbose”
}
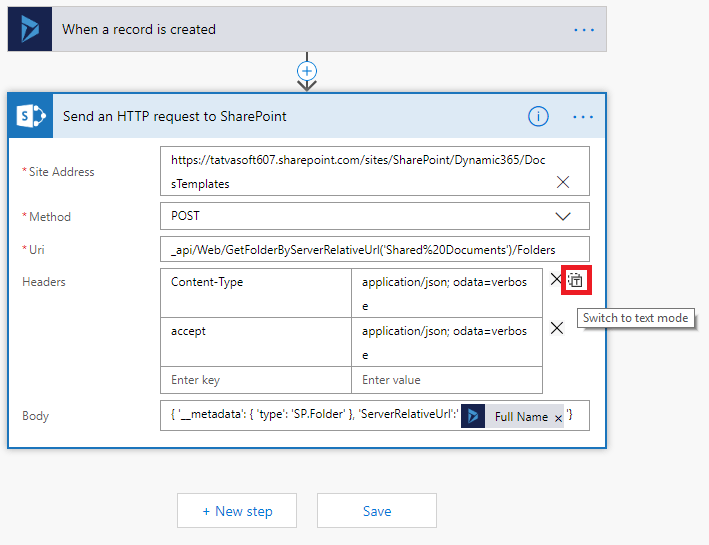
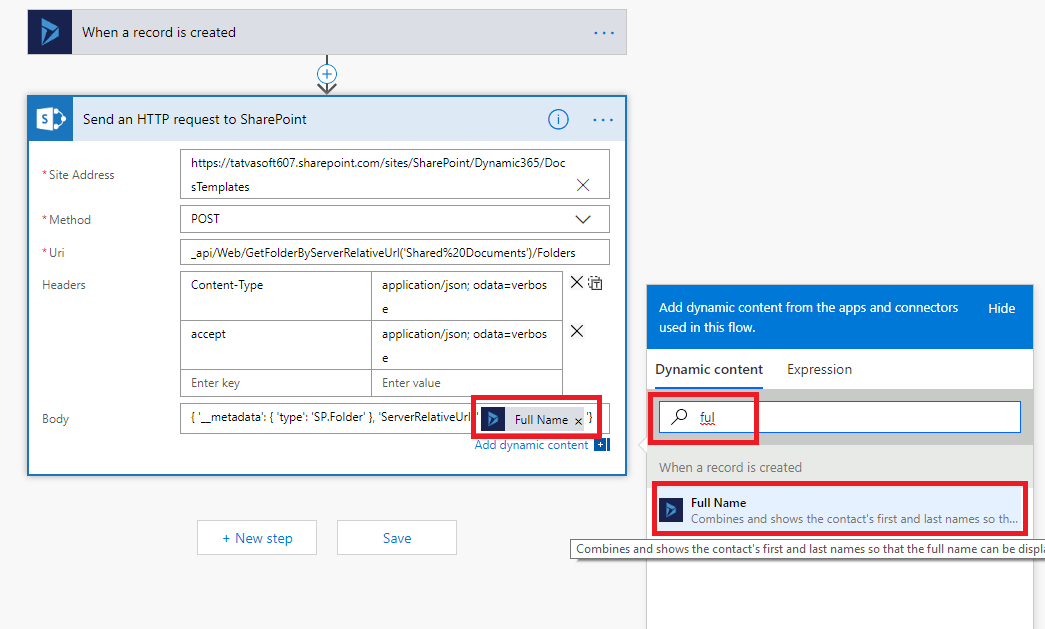
- Body: Enter the Body like below:“{ ‘__metadata’: { ‘type’: ‘SP.Folder’ }, ‘ServerRelativeUrl’:’@{triggerBody()[‘fullname’]}’}”Note: here “@{triggerBody()[‘fullname’]}” is selected “Full Name” from the Dynamics Content showing in below screen shot. This is Dynamics 365 Contacts entity attribute, we can select another attribute if we required.
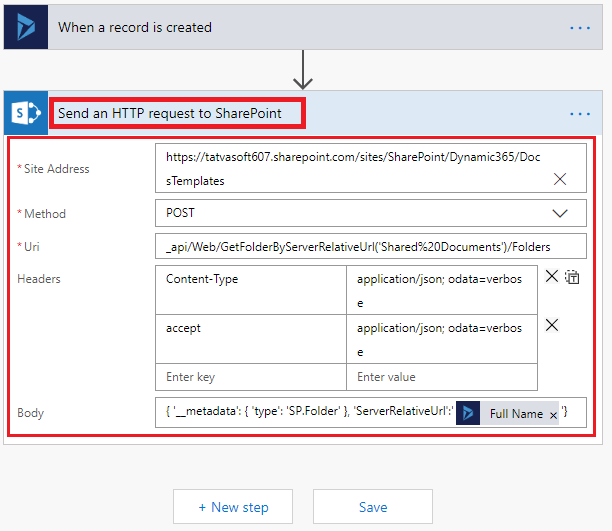
 After all the configuration it will look like below:
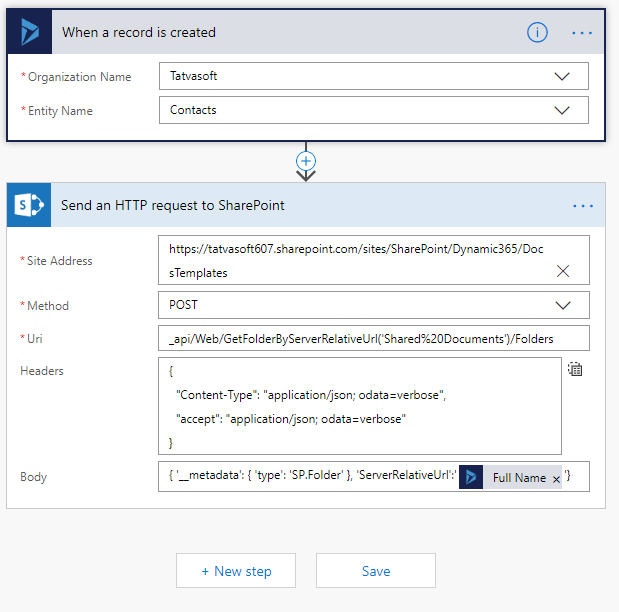
- Now, Microsoft Flow is ready, the full flow will look like as shown below:
- Click on the Save Button from the top-right corner.

- Now, our Flow is ready to execute.
- To test it Open the Contacts Entity in Dynamics 365.
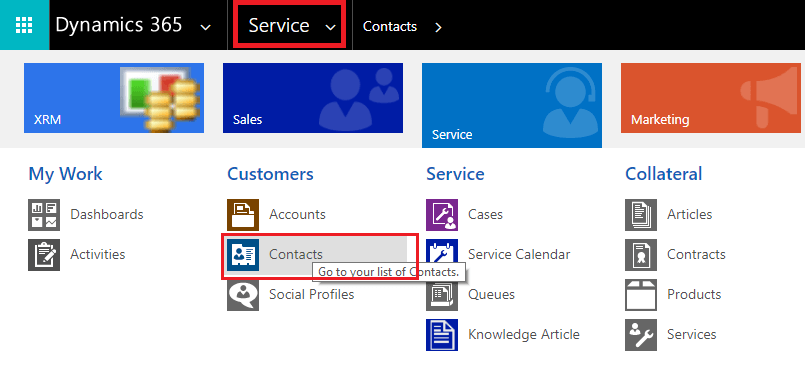
- Click on the New Button.

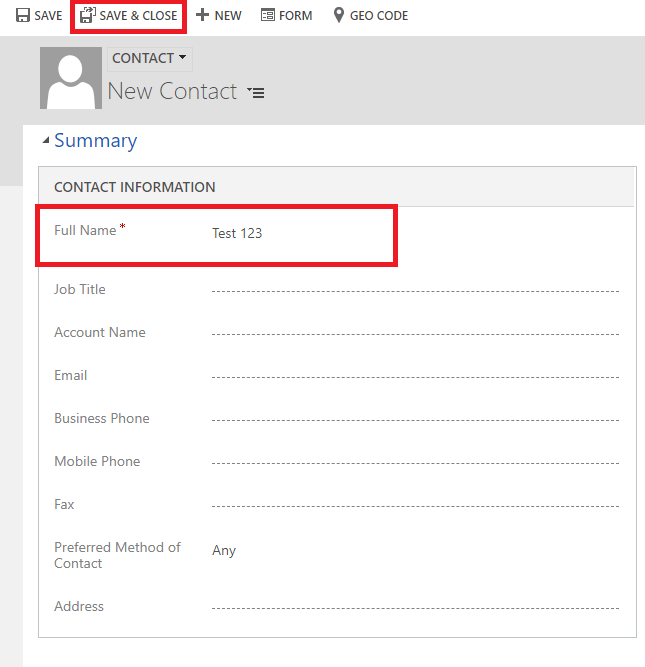
- Enter the details like Full Name, Job Title, etc. and click on the “Save & Close” button.
- Once the item is created, it will create a Folder in the SharePoint Document library based on the Full Name.
Conclusion
From this blog, we have created a folder in the SharePoint Online document library with the same contact name added in Dynamic 365 entity using MS Flow. Using this approach, without any custom solution, SharePoint development company can perform various operations across multiple tools and services. This automated process will be very useful to copy/sync data between various Office 365 apps e.g.: (Between Dynamic 365 to SharePoint Online) and from other tools.

Shital Patel
Shital Patel is VP at TatvaSoft with a high-level of proficiency and technical precision in SharePoint Development. His experience of the last two decades has helped businesses to solve complex challenges resulting in growth and performance of Startups to Fortune 500 companies.
Subscribe to our Newsletter
Signup for our newsletter and join 2700+ global business executives and technology experts to receive handpicked industry insights and latest news
Build your Team
Want to Hire Skilled Developers?




Comments
Leave a message...