Related Blogs
After a bunch of wonderful announcements in recent Ignite 2019, Microsoft provides rigorous innovations and update releases in their products and solutions. Organizations have huge amounts of data lying in different database servers, stored in drives as documents and as hard-core paper documents in their file closets. Often manual processes increase the pile of paper documents and thus lead to slower business processes in huge organizations or the organizations which are geographically distributed. Microsoft has provided a platform – Power Platform to help SharePoint developers and end-users easily manipulate, surface, automate, and analyze data lying under different data sources.
Here, in this blog, we will learn about Power Platform and details of applications that can be created using this Microsoft platform.
What is the Power Platform?
In this digital age, the world is extremely reliant on data – companies are creating data and are increasing continually, but without the insight on data, it will be useless for them. They need a tool to analyze or process such data to gain insight into data. From the past, you can see that these data analysis, app development, and set up automation processes are handled by Software development teams. This would require additional people who first analyze your current situation, understand your needs to see as an end-user and outline a requirement for development teams. This custom apps development is costly, time-consuming, and would cause internal delays.
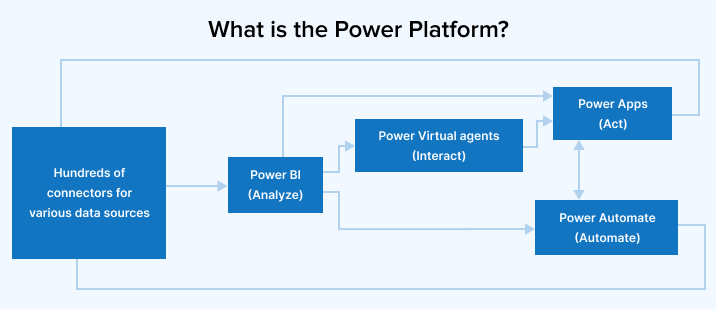
The Power Platform is very exciting as it is an association of the four Microsoft products: Power BI, Power Automate, Power Apps, and Power Virtual Agents. The Power Platform aims to provide you with the power to build custom apps as per your business needs. Secure and cloud-based storage is provided by the most underlying data source – Common Data Service for your data. You can build your custom applications to connect with your data stored in Common Data Service or any Online/On-premise data sources. SharePoint developers can use data from Office 365, Dynamics 365, as well as any third-party apps and other Microsoft SharePoint development services.
Power Platform provides you the ability to develop your apps without writing any code and saves your time and money being spent on custom application development. The Power Platform is new, and Microsoft will provide regular updates to make them mature. Microsoft will bring their services closer together, and Power Platform will be a key player to connect all services like Dynamic 365, Azure, and Microsoft 365.
Power Platform contains the following applications –
- Power BI – to show and analyze your data.
- Power Virtual Agents – smartly interact with data.
- Power Apps – act and modify data.
- Power Automate – automate data.
Let’s explore the Power Apps in more detail with the series of this blog.
Power Apps
Power Apps is defined as a suite of apps, services, connectors, and data platforms. It provides an extensive application development environment to build apps as per your business needs. Various Online and on-premises data sources are provided to connect with your business data to create your custom business apps.
Apps built using Power Apps have a responsive design and, therefore, seamlessly run on the browser as well as in mobile – tablet devices. Your manual business processes are transformed into automated processes through these apps.
Power Apps targets both business and SharePoint developers. It provides a platform where non-techie can create apps without writing any code, and SharePoint developers can write code to interact with data and metadata programmatically, to build complex business logic, and to create custom connectors.
Building apps using Power Apps helps from SharePoint developers to business analysts to develop apps with more intuitive tools that don’t need code and work faster with a data platform that connects various data sources. You can build highly tailored and sophisticated applications without using any conventional app development approaches that give more flexibility and freedom.
Apps can be developed using the PowerApps Studio client application or directly from the browser. However, the browser version is highly popular and faster to use in the development of apps. There are several templates already available to start building apps.
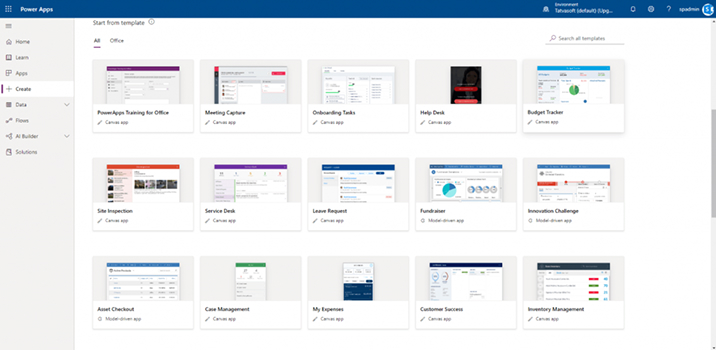
There are two types of apps: Canvas apps and Model-driven apps.
Canvas Apps
To fabricate the user interface and experience in your desired way, the Canvas app entertains that liberty to you. You can set the look and feel of apps the way you want it. You can link over 200 connectors and 100 templates in your app. Canvas apps can be created for the web, mobile, and tablet applications.
You can drag and drop elements that you require to create your canvas app. You can pull data from multiple data sources and combine it into one app.
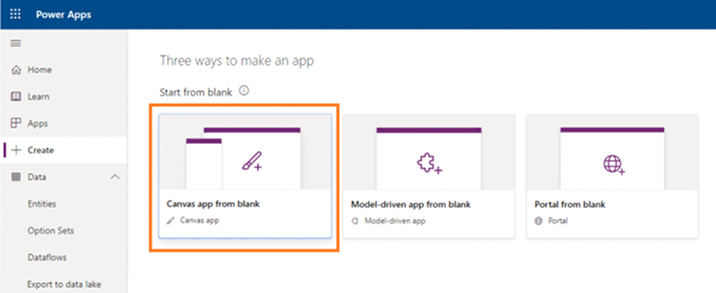
You can start to build your app in one of the following ways:
- From a SharePoint list

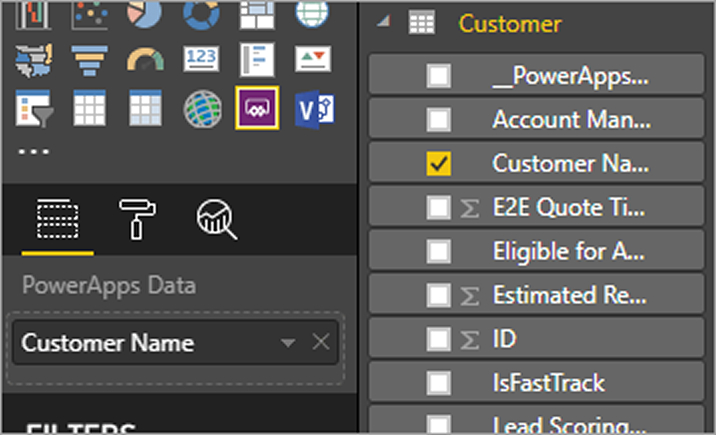
- From a Power BI dashboard
- From a Power Apps Studio: login to https://make.powerapps.com
Model-Driven Apps
Model-driven apps are relatively new to Power Apps. You can create an app without code and with simple or complex business logic. Model-driven apps run either as a standalone app or as a back-end app for canvas apps. In this app, you can create your data model as per your requirement and with a unified client interface to look similar on mobile, tablet, and web. If you are familiar with Dynamics 365, then you already have used a model-driven app without knowing it. Dynamics 365 is designed to store data in CDS. You can create entities for your app in CDS while developing it.
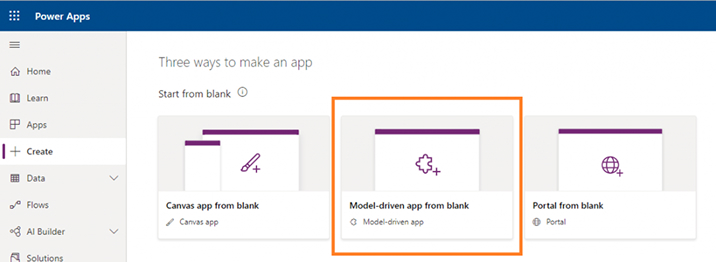
You can start to create your app from Power Apps Studio:
Canvas App vs. Model-Driven App
Upon reading about both apps, you find both apps quite similar, but that’s not the whole truth. Though both have the same components to their design, the main difference is over user control. You have full privileges on every single aspect of your app while creating it.
In a Model-driven app, your entered data will control your app. The output of the app will be decided by the input you add. The layout and overall design will be more affected than the Canvas app. If you need flexibility, choose the Canvas app, or you are more concerned about structure, choose the Model-driven app.
Canvas Apps
Let’s see a small demo with Power Apps, Power BI, and Power Automate. SharePoint developers have prepared a Canvas app to collect Student Data from users and store it in the SharePoint list. There is an automated approval process that sends details to the administrator once the user submits the information. After the approval of the administrator, details will be stored in a SharePoint list. One Power BI report is prepared where all the details will be reflected to analyze the data.
Create a Canvas App
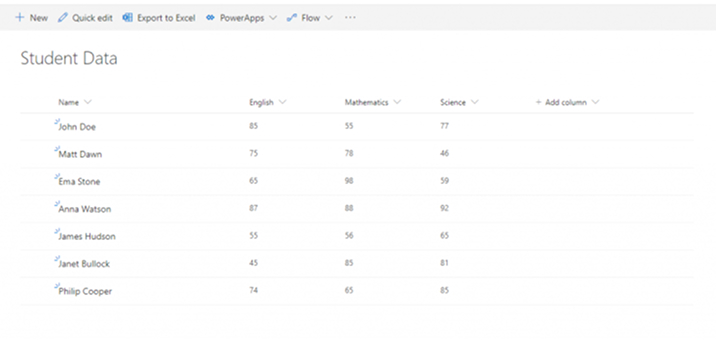
- Login to the SharePoint site and create one SharePoint list as below:
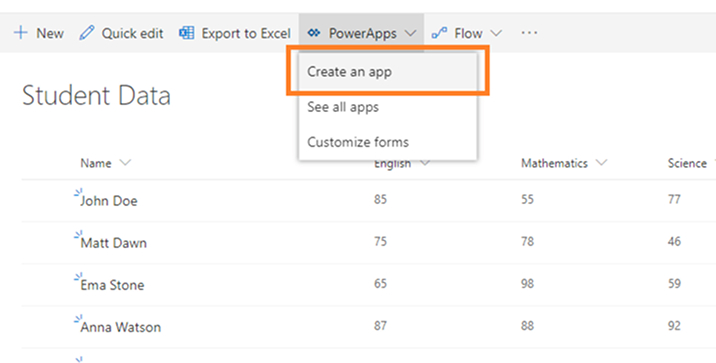
- There is a “PowerApps” option in the command bar. Select the “Create an app” option.
- The left pane will be opened to ask for the name of the app. Pass the name and click on the “Create” button to create a new app in Power Apps. The app will be opened in App Studio.
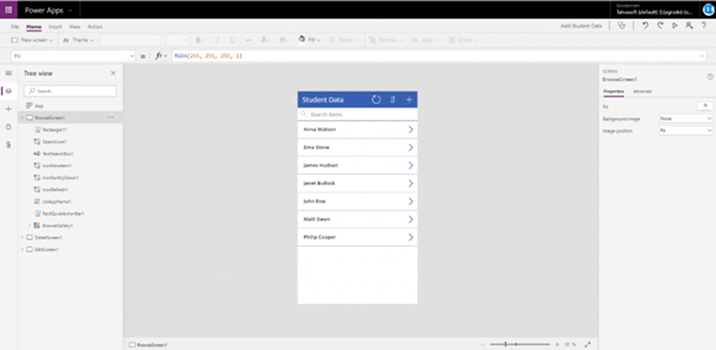
- The app will have several screens already created, based on the list like Browse Screen, Details screen, and Edit Screen. Add/Edit form will have validations on fields that are supported by SharePoint OOTB validations on columns.
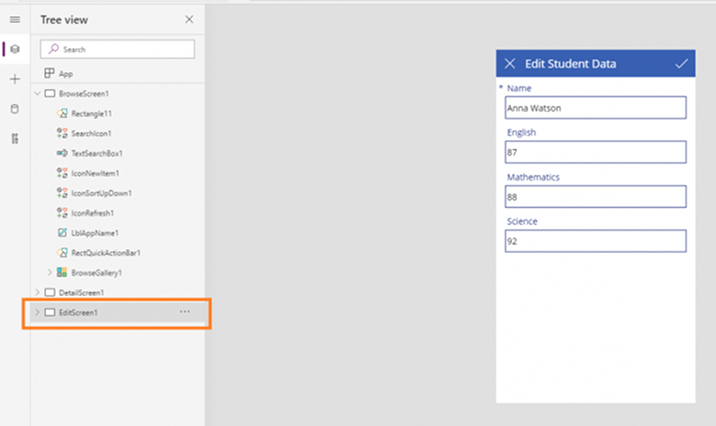
- Click on “EditScreen1” from the tree view to open a form in the editor. You can find fields for all columns from the SharePoint list.
- Click on the triangle icon from the top bar on the far most right to preview the app.

- You will find below screens and functionality already created by Studio in the app:
- Show all items from the list on the browse screen.
- Search items based on the “Title” column from the SharePoint list.

- Show Item detail screen.
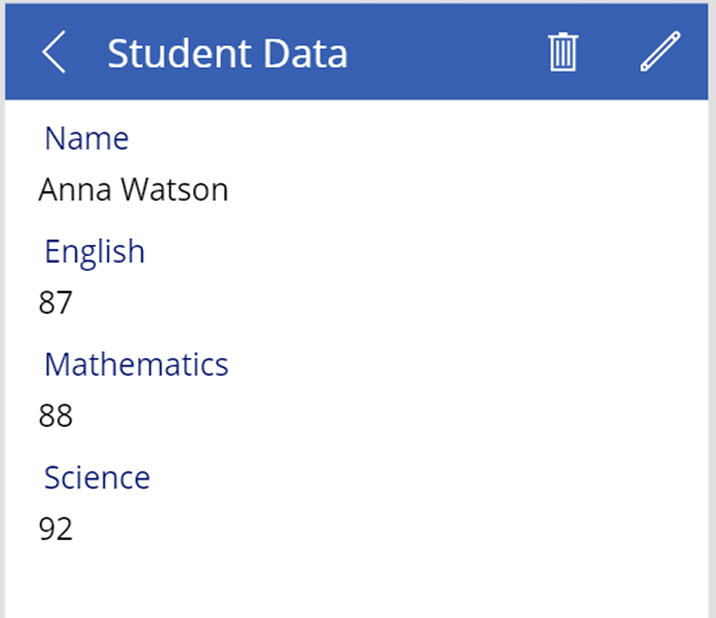
- Show Item detail screen.

- Add/Edit form on the screen.

Create a Flow in Power Automate
Now let’s create a flow for the approval process and attach it with the app.
- Go to “EditScreen1” and click on “Action” → click on “Power Automate,” → click on “Create a new flow.”
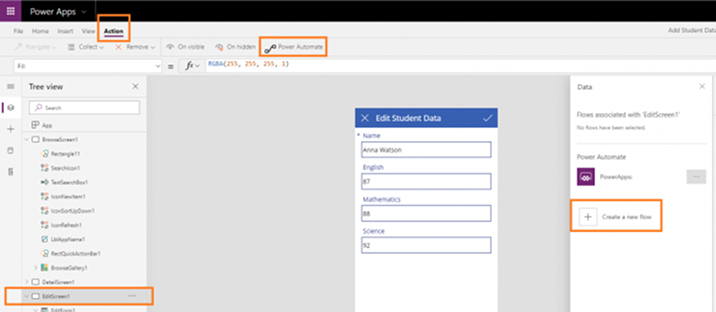
- The Power Automate screen will be open in the new tab where there are many templates provided by Microsoft available, or you can create your custom flow as per your requirement.
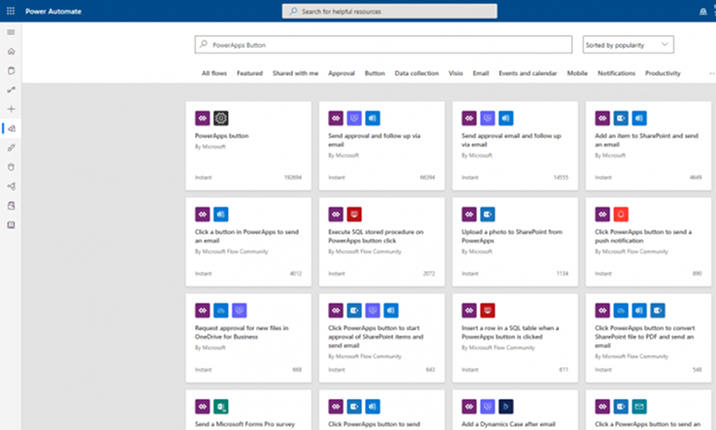
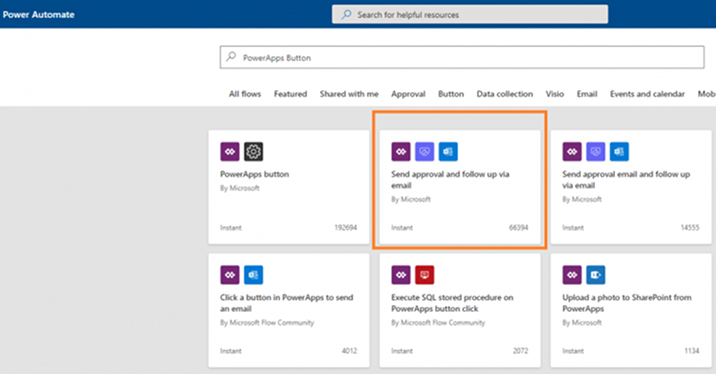
- Choose the “Send Approval and follow up via email” template and create a flow.
- A flow will look like as below:
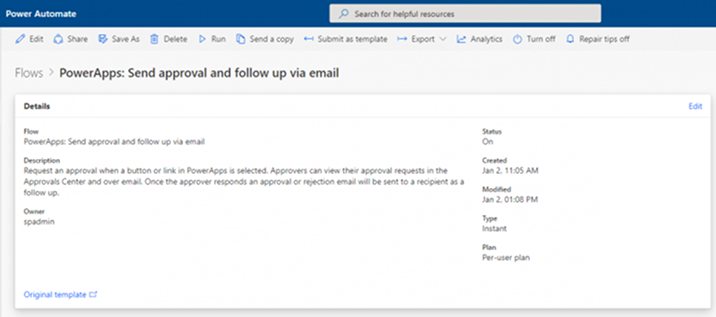
- Click on “Edit” to open a flow in edit mode. You can see a flow with a default approval process is already created, where it will send an email to the approver. Once the approver approves/rejects your request, it will acknowledge it to the requestor.
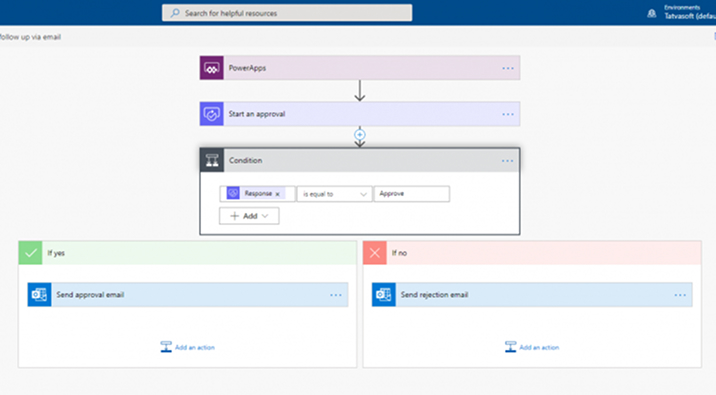
This is the default flow created from the template. Let’s make a few changes to it.
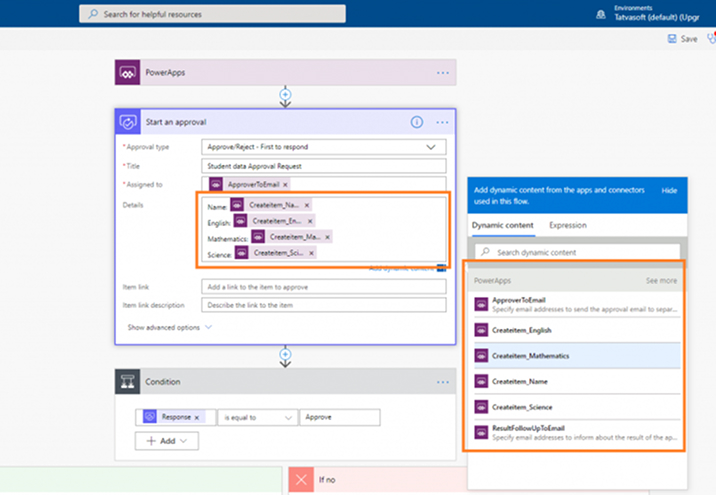
- Click on “Start an approval” to expand that action. Add Name, English, Mathematics, and Science details by selecting from Dynamic Content pane as shown in the below image:
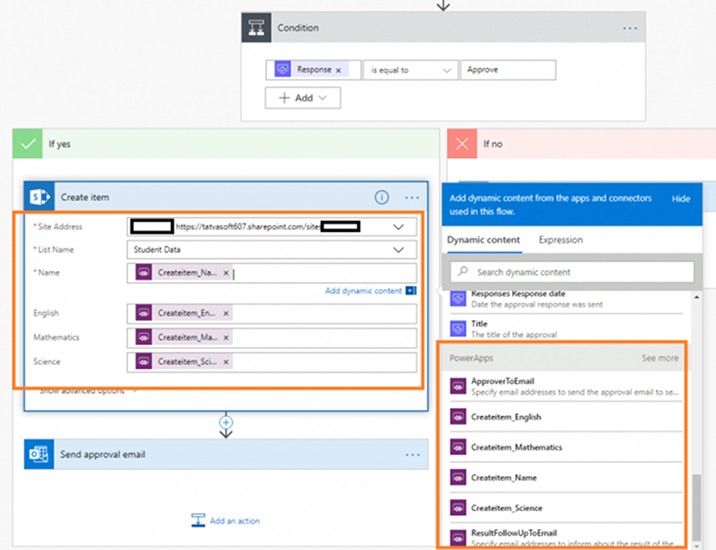
- In the “Condition” action’s “Yes” part, add the “Create item” action to create a new item in the “Student Data” SharePoint list. Pass appropriate site name, list name, and student details, as shown in the below image:
- Save the changes inflow.
Let’s connect this flow to Power Apps, i.e., when the user submits the form in-app, details will be sent to the approver for the approval process, and once it’s approved by the approver, it will be stored in the SharePoint list.
- Open the app in Power Apps studio → open Power Automate, and you will see the flow created earlier.
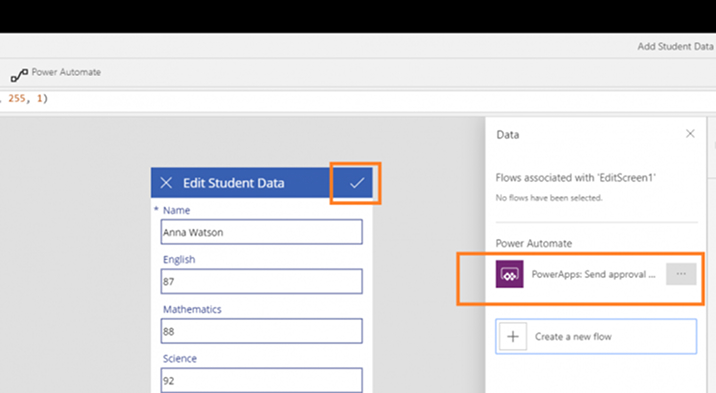
- Click on the “Submit” button and add a formula to connect flow with the submit button event.
- There are few parameters: email address of approver, email address of the user (who filled the form), fields: name; English; Mathematics; Science required to pass these values inflow.
- Write the below formula on the “Submit” button event:
If(EditForm1.Mode=FormMode.Edit,

SubmitForm(EditForm1)
+
Navigate(BrowseScreen1,ScreenTransition.Fade),
'PowerApps:Sendapprovalandfollowupviaemail'.Run("<approver user="" email="" id="">", User().Email,DataCardValue5.Text,DataCardValue6.Text,DataCardValue7.Text,DataCardValue8.Text)
+
Navigate(BrowseScreen1,ScreenTransition.Fade))
</approver>
If(EditForm1.Mode=FormMode.Edit, SubmitForm(EditForm1) + Navigate(BrowseScreen1,ScreenTransition.Fade), 'PowerApps:Sendapprovalandfollowupviaemail'.Run("<approver user="" email="" id="">", User().Email,DataCardValue5.Text,DataCardValue6.Text,DataCardValue7.Text,DataCardValue8.Text) + Navigate(BrowseScreen1,ScreenTransition.Fade)) </approver>
Note: This formula will check if the form is in edit mode, it will save changes in the list, and for new items, it will send it for the approval process and then will save it in the list after the approval process.

- SharePoint developers can test their app by running in preview mode.
- Save the app and publish it.
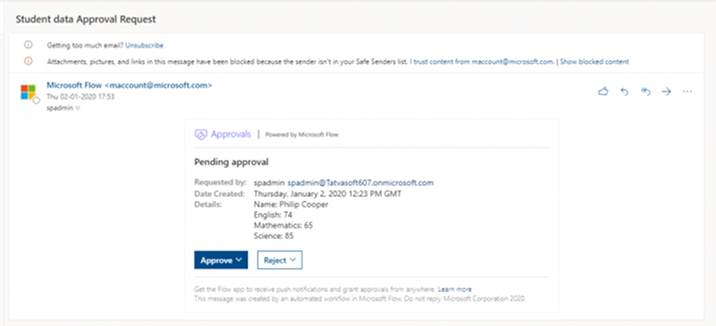
- Approver users will get below mail during the approval process. Student details will be saved once the user approves the request, and the requestor will acknowledge the email.
- Without coding and in very few steps, you can create a Power App and approval system connected with it. Formulas used in Power Apps are very similar to excel and Power BI report formulas that are quite easy to use.
- Note: Please follow the best practices in naming conventions for the elements used in Power Apps. To show you the default functionalities – capabilities of Power Apps and Power Platform, we haven’t followed that in our demo.
Create a Power BI Report
Our expert SharePoint developers have also prepared a Power BI report connected with a SharePoint list to generate various charts. It’s very easy to analyze data where you can access real-time data in a Power BI report.
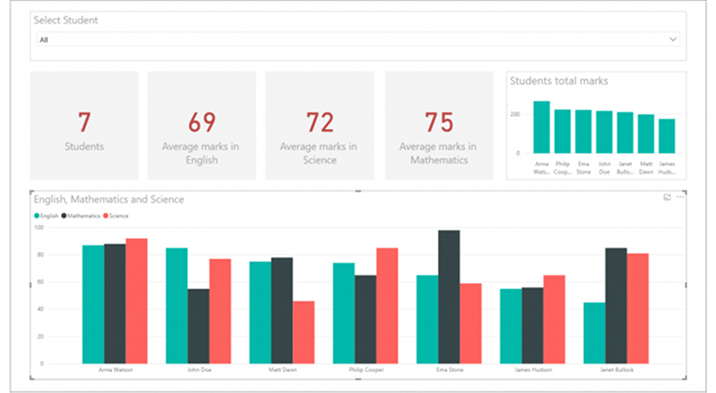
Go through this blog to generate a Power BI report using a SharePoint list and integrating the Power BI report in your SharePoint Online.
Conclusion
Via this blog, one is aware of the power of this MS product. Based on end-users requirements, one can opt for the Power Apps type. If there is a requirement for some good GUI experience for an app, to carry out some automated processes, and to summarize the captured data which is available through many of the outs of the box connectors, a Canvas app is an excellent choice to go. Also, one can achieve this requirement by following this blog. In our next blog, we are coming with the Model-driven apps. So, stay tuned!!!
More Blogs on Power BI, Power Automate:
AI Builder for Power Automate
Power Apps + Microsoft Bots = Power Bots
Power Virtual Agents

Shital Patel
Shital Patel is VP at TatvaSoft with a high-level of proficiency and technical precision in SharePoint Development. His experience of the last two decades has helped businesses to solve complex challenges resulting in growth and performance of Startups to Fortune 500 companies.
Subscribe to our Newsletter
Signup for our newsletter and join 2700+ global business executives and technology experts to receive handpicked industry insights and latest news
Build your Team
Want to Hire Skilled Developers?




Comments
Leave a message...